
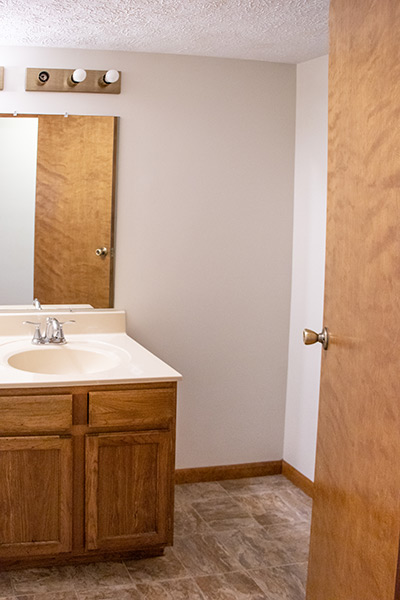
Sometimes floor plans don’t make a lot of sense. That’s how we felt about the half bathroom of our new fixer-upper. A large vanity adorned the main wall with ample space on both sides. Hiding in a corner behind the door, the toilet was awkward at best. After a year of dreaming up ways to make better use of the space, we finally began an ambitious remodel to downsize our half bathroom.
Before the Bathroom Remodel
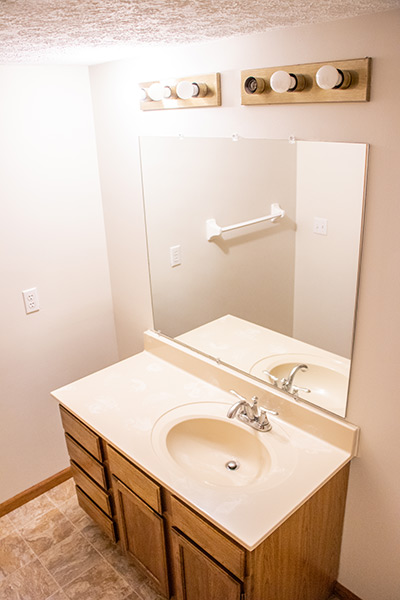
For a half bathroom on the main floor, the large vanity, peculiarly placed toilet, and vast open areas were just plain odd. Add to that the original 1980s fixtures, and this room was simply begging to be updated. To further make the case for a bathroom remodel, the vanity and flooring were in poor condition due to previous water damage. Although we had replaced the toilet prior to moving in, everything else had to go.

Consulting with the Experts
The flip side of downsizing an interior room is creating more space in another area. In our case, that’s exactly what we wanted. There was just one hitch. The HVAC and plumbing stack from the basement to the second floor ran through a large dead space behind the wall that we wanted to move. Was this bathroom remodel even possible? If so, could we afford it?
We requested bids from two contractors we had worked with in the past. Both determined that it was feasible. The more favorable bid came from the company that had installed our HVAC system the previous year. This company also specialized in plumbing, so it was an easy choice.
Working with a Contractor
Their Part
In addition to downsizing the bathroom by moving both the wall and the HVAC and plumbing stack within the wall, we asked that our contractor complete everything through drywall finishing. This included minor electrical work to move lighting, switches, and outlets; plumbing rough-ins for the new location of the toilet and sink; and truly venting the bathroom fan through the attic rather than just the ceiling.
Our Part
Our part of the bathroom remodel was to remove the toilet, vanity, mirror, and lights before the project began. When our contractor finished the job, we did the painting, flooring, baseboards, and installation of the new fixtures.
Styling the Bathroom
When it comes to decorating, I’m usually pretty much at a loss. That’s why I bought Designer in a Binder when I discovered it online. Through Designer in a Binder, I learned about waiting to choose a color palette until I had a crucial design element for the room. In the past I would have chosen a wall color first and then tried to make it work with everything else.
From the start of the bathroom remodel, I knew I wanted a navy vanity and dark (oil rubbed bronze or black) fixtures. I created a mood board in PowerPoint and tried to find artwork with my husband’s favorite Bible verse, Romans 12:12. Etsy had several possibilities for the artwork, but none of them seemed to fit the bill.
Eventually, I asked my husband for his best landscape photography pictures. As our crucial element we chose this photo that he took at a local park. I added the Bible verse to it using a navy-blue font that repeated the color of the vanity.
I loved the lush greens in the photo and wanted to repeat them in the bathroom as well. With no natural lighting and my inability to keep indoor plants alive, I decided that fake plants would have to do. Since the vanity counter was small and we have four very active kids, wall shelves for the plants seemed like the best idea.
I searched online for affordable shelves but never found anything that quite fit the bill. In an effort to repeat the shape of the mirror and towel ring, I had my heart set on circular shelves in a dark metal color. We finally found the perfect shelves, vases, and plants while browsing the lovely shops in Waynesville, Ohio on our anniversary date.
Refacing the Door
Every door in our 1980’s fixer-upper is a flat, wood-grain textured, hollow-core door. While we love the look of shaker-style doors, we wanted a budget-friendly option for updating the doors in our home. My husband came across a blog post for a DIY method to reface flat doors so that they look paneled. So, we gave it a try. He added the panels to the door, and I sanded and painted it. It was a lot of work, but we love how it turned out.
Bathroom Remodel Reveal
The newly remodeled half bathroom is cozy with warm colors and simple decorations. The circular shelves play off of the mirror and towel ring while the artificial plants repeat the colors and imagery of the landscape scene. The light walls are a pleasing backdrop for this small space.
Conclusion
Downsizing our half bathroom was a great decision. The bathroom is now the perfect size for a half bath, and the simple design brings us joy. As the first fully remodeled room in our new fixer-upper, the bathroom gives us the needed encouragement to continue making over the rest of our home.