
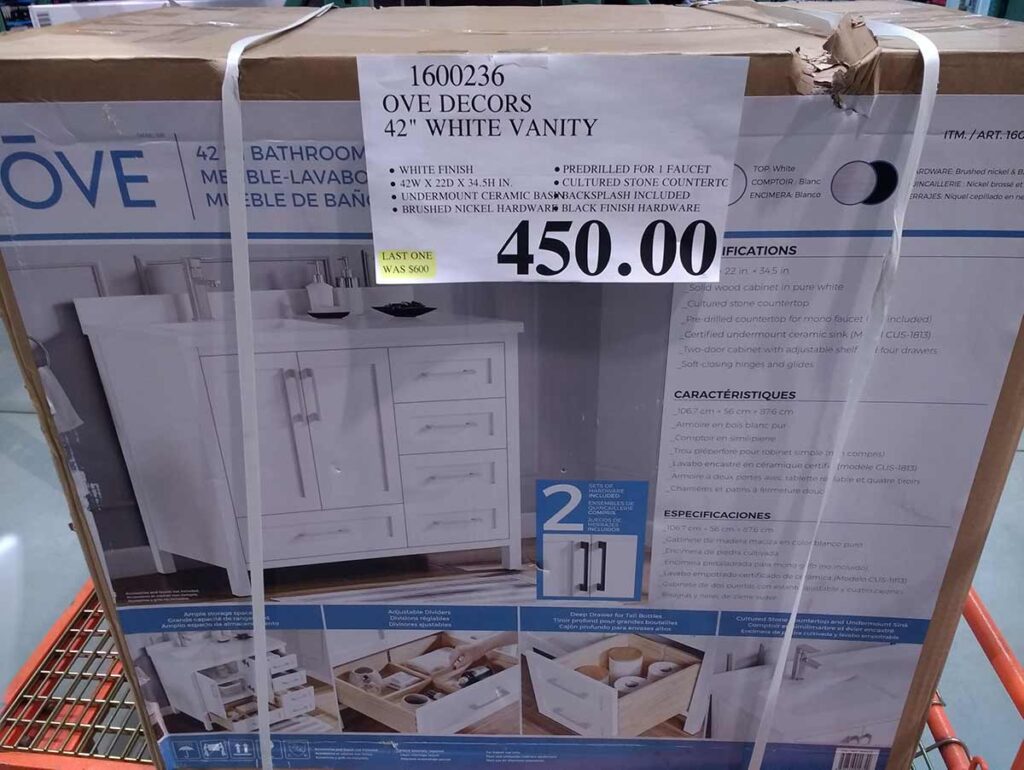
This bathroom remodel began with a trip to Costco for groceries. Like usual, I walked the home goods aisles first, looking for fun finds. That’s when I stumbled upon the bathroom vanity that I had been eying for months. It was clearance priced and was already sitting on a flatbed cart. After a quick text to my husband, I had the go-ahead to buy the vanity. For the record, I still bought our groceries that night too.
Table of Contents[Hide][Show]
Some of the links in this post are affiliate links. Learn more in my disclosure policy.
Scope of the Bathroom Remodel
Bathroom remodels aren’t cheap even when you score a great vanity on discount at Costco. Although there were many changes we wanted to make in this bathroom, we edited our wish list to make it more affordable.
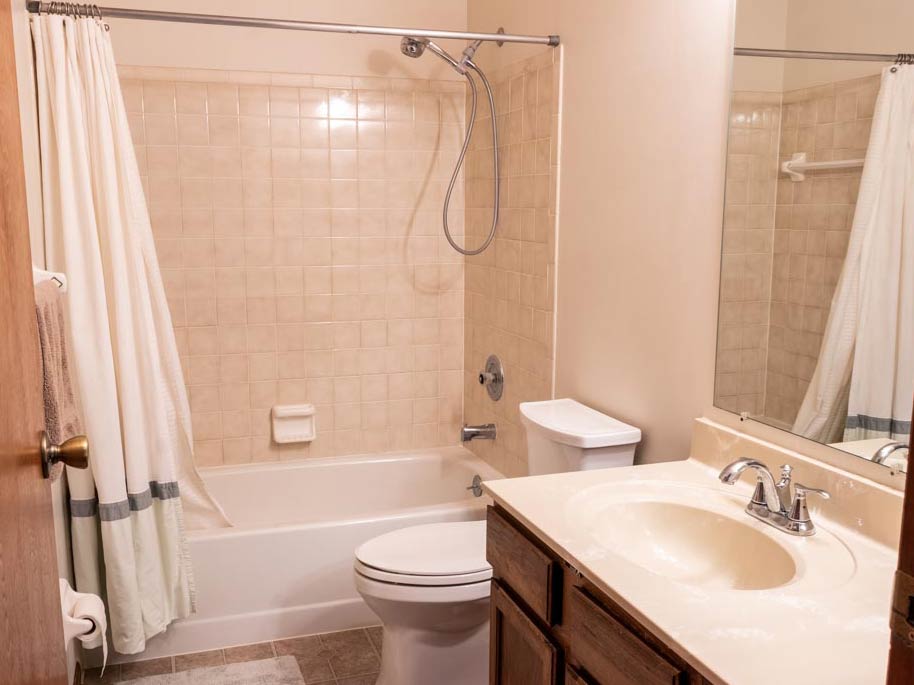
Keeping the Existing Tub and Tile
We sought two quotes to replace the tile surround with a smooth acrylic surface, but the estimates were much more expensive than we had expected. One of the salesmen even admitted that the existing tile was in pretty good shape. Although we didn’t love the color of the tile, spending several thousand dollars to replace it didn’t make sense.
Updating the Shower Valve and Trim
Our house was built in the late 1980s before anti-scald shower valves were the norm. Thus, we were constantly getting scalded or frozen when someone used water elsewhere in the house. Having solved this issue at our previous house when remodeling its bathrooms, we knew we had to replace the shower valve.
Fortunately, our plumber was able to replace the valve from behind by cutting a hole in the wall of our master closet to access it. Otherwise, the plumber would have had to remove some of the tile and risk breaking it to change out the valve. We chose a Moen valve and trim set just as we did at our previous house.

Additional Plumbing
Although the new vanity sink was in the same location as the original, a drawer at the bottom of the new vanity made it necessary to move the plumbing for the sink higher. Our plumber moved the drain and the water supplies up several inches. He also installed new shut-off valves for the toilet and sink.
Better Lighting and Ventilation
We had already replaced the exhaust fan in this bathroom when we remodeled our half bathroom. At the time none of the exhaust fans were vented out of the house, so our HVAC contractor properly vented three of our bathrooms for us during that project.
A year later when we hired an electrical contractor to add lighting to our cathedral ceiling, we also improved the lighting in this bathroom. They added a light above the shower and changed the vanity light from two separate locations to one central location in preparation for this remodel. We also had them install a fan control with a humidity sensor, which has been a great help when our kids forget to use the exhaust fan.
A Flat Ceiling
There is something about flat ceilings that is so calming to me. Unfortunately, our house has textured ceilings everywhere, and some are quite out of my reach. My ultimate goal is to flatten all of the ceilings in our home, but I may have to concede on some of our taller ceilings.
As strange as it may sound, my top priority in this bathroom remodel was creating a flat ceiling. As I scraped, sanded, skim coated, and sanded some more, I could imagine myself relaxing in the tub and enjoying my gloriously flat ceiling. Since the ceiling had been painted in the past, it took quite a bit of work to flatten it, but I love the result.
Smooth Walls
The wall behind the toilet had always been strangely lumpy. It turns out that painted-over wallpaper can have that effect. I tried to sand it flat and skim coat it, but I ultimately had to remove much of the wallpaper first.
Another challenge presented itself when we removed the vanity, and the top layer of drywall paper tore off with it. I quickly found that skim coating what remained only caused the torn paper to bubble up. Thanks to this drywall tutorial on YouTube, I learned that primer must first be applied to the tears in drywall paper before adding drywall mud.
The electrical changes that we made created some small to medium-sized holes to patch. Removing the medicine cabinet without replacing it resulted in a substantial hole. My husband and I made a great team here. He created drywall patches for each hole, and I did the finish work with drywall tape, mud, and sanding.
New Flooring
After much deliberation on colors, we chose a luxury vinyl tile from Lowe’s that resembles a grayish-brown wood floor. My husband installed it while I was out of town.
Refaced Door
Just as we did with our half bathroom downstairs, we refaced the existing flat, hollow-core door to give it a Shaker-panel look. Although it was a lot of work, I love the result.
New Baseboards and Trim
My husband replaced all of the old baseboards and trim for a fresh look. I’m grateful that he handles all of the cutting and installation.
Decorating Decisions
Wall Color
Although it’s often frowned upon to choose your wall color first and then design around it, we did. And by keeping the remaining details neutral, this method worked quite well.
Our kids requested that we paint their bathroom the exact same color that it was at our previous house – Oyster Bay from Sherwin Williams. Amazingly, this new color made the existing tile look much better than it did with the old wall color.
Hardware Colors
The vanity from Costco came with drawer pulls in both nickel and black finishes. We chose black for much of our hardware in the bathroom, but we also mixed it with antique bronze in the tub fixtures and the vanity light. The two are pretty close together, and sometimes it was easier and more affordable to choose one over the other.
Vanity Mirror
We chose a rectangular mirror with rounded edges in a black metal frame. We measured multiple times and drew a template on kraft paper to determine the right size before ordering. Later we used the kraft paper template again to make sure we set the screws in the proper locations for hanging it.
Shower Curtain
The kids and I found the shower curtain at Marshall’s for under $20. They loved it, and its simplistic design worked perfectly.
Bathroom Rug
Keeping the same wall color meant that our existing rug already matched. Another cost and design decision averted.
Wall Art
Our kids love The Wingfeather Saga book series and now streaming animated show by Andrew Peterson. We chose to decorate the bathroom with six neutral prints from the books. I found floating frames with black plastic edges at JOANN. We used Command Picture Hanging Strips to prevent damage to our newly smooth walls.
Towel “Ring”
As much as I wanted to avoid putting new holes in the walls, we needed a wall-mounted hand-towel holder. I tried a counter-top model, but it was ungainly and really detracted from the space. When I found this minimal, modern towel holder, I knew it was perfect for the style of the bathroom.
Toilet Paper Holder
Due to space constraints we decided to mount the toilet paper holder to the vanity. However, I didn’t want to damage the vanity. We chose a very inexpensive adhesive-mount holder for the job. I removed the existing adhesive and mounted it with Command Picture Hanging Strips instead. It’s not a perfect fix as our kids have tugged too hard and pulled it down a few times. However, they’ve learned to be gentler with it, and I like knowing that we didn’t damage the vanity when installing it.
Conclusion and Final Reveal
We love how this bathroom remodel for our kids turned out, but this renovation was put on the back burner multiple times while I was busy with homeschool and later with unexpected travel to help my parents. This is only the second room that we’ve fully remodeled in our fixer-upper, not counting some improvements my husband has made to the basement.
At times it seems that we’ll never finish all of our house projects, yet each completed space is a win that pushes us closer to our goal. In the meantime, we continue to save, plan, dream big, and learn contentment along the way.