
In 2015 we completed a long-awaited kitchen remodel that made our home much more functional and enjoyable. After years of dreaming and saving, our kitchen remodel wish list was quite long. We had lots of big ideas, but our budget and space constraints were limited.
Table of Contents[Hide][Show]
The Kitchen Remodel Wish List
Our kitchen remodel wish list was more than just new colors and finishes. There were several areas where we needed to increase functionality and storage space.
Closing Off the Laundry Room
One of the biggest changes we wanted to make to our kitchen was closing off the laundry room. In our already small home, we needed the ability to muffle the noise of the washer and dryer. We also wanted to be able to hide the laundry room when we had guests.
Increased Pantry Space
When we first bought our house, we laughed at the “pantry” in the laundry room. In reality it was the inside of the wall behind the refrigerator. Each shelf was about three inches deep. It could hold some canned goods, but that was about it.
New Appliances
The dishwasher that came with the house was on its last leg the day we moved in. I begged to replace it, but my husband advised holding out until we remodeled the kitchen so that all appliances would match. It was a long nine and a half years, but I am glad we saved our money and waited for the matching set.
An Island with Seating
The original kitchen boasted a large island with seating for two. My husband and I both enjoyed sitting at the island and wanted the new design to include seating. Unfortunately, the space we could dedicate to an island decreased with the new design. After many graph-paper iterations of the kitchen design and a little thinking outside the box on the counter shape, we achieved this wish list item.
Hidden Trash and Recycling Bins
Hiding the trash can and adding space for a recycling bin within the kitchen was one of my top wish list items. Since I do most of our food preparation at our island, that was the ideal location. I also didn’t have space for this addition anywhere else. I had to get creative with a semi-custom island design to accomplish this feat.
A Functional Corner Cabinet
The original kitchen had a blind corner cabinet that I practically had to crawl inside of to reach items at the back. Because I wanted to add more drawers to our kitchen, I knew I needed to change this to a 33-inch, 90-degree corner cabinet. Making this change required moving the sink about 10 inches to the left. Fortunately, this move was not costly with regard to plumbing changes.
I investigated numerous corner cabinet organization systems from the traditional lazy Susan to these pullout models. In the end, we chose a corner cabinet with a single shelf, and its simplicity and storage capacity have worked great for us.
Improved Lighting
We knew the large fluorescent lighting had to go. Fortunately, we had enough room in our budget for the installation of recessed lighting. We also designed the cabinet above the sink with a valance to hide an overhead LED light.
A Unified Floor
What we now use as our dining and office space used to be a family room with carpeting. This room was open to the kitchen that had peach-colored tile. We wanted one flooring option for the kitchen, dining/office, and laundry rooms since they all flowed together.
I love the look of a wood floor, but neither hardwood nor laminate are ideal for wet areas like laundry rooms and kitchens. Fortunately, luxury vinyl plank flooring allowed us to tie all three areas together. After four years of use, our floor is still in great condition. The occasional scratch seems to self-heal, particularly after mopping.
Kitchen Remodel Design Constraints
All remodels have design constraints that limit the possibilities. Ours was no different. We worked with local contractor, Brentwood Builders, as the scope of our kitchen remodel was beyond our DIY skills.
Quality Cabinets on a Budget
The year before we remodeled our kitchen, we added a wall of locally-made custom cabinets to our dining area. I knew our kitchen budget didn’t have room for the cabinet design I desired since it required custom sizes so that everything would fit just right. I searched online for more options. When I found Barker Cabinets, a ready-to-assemble, semi-custom cabinet manufacturer in Oregon, our kitchen design really came together.
The Limitations of a Slab Foundation
Our house is built on a concrete slab. Any electrical or plumbing changes made to the floor require a jackhammer and increased budget. Thus, we were determined to keep our sink and gas range at or near their original locations.
This limitation also dictated that our island had to be movable, rather than fixed, since building code required a fixed island to have electrical outlets installed. Choosing to keep the island movable has been helpful for appliance installations and maintenance. We can easily shift it to the side to gain better access.
Refrigerator Location
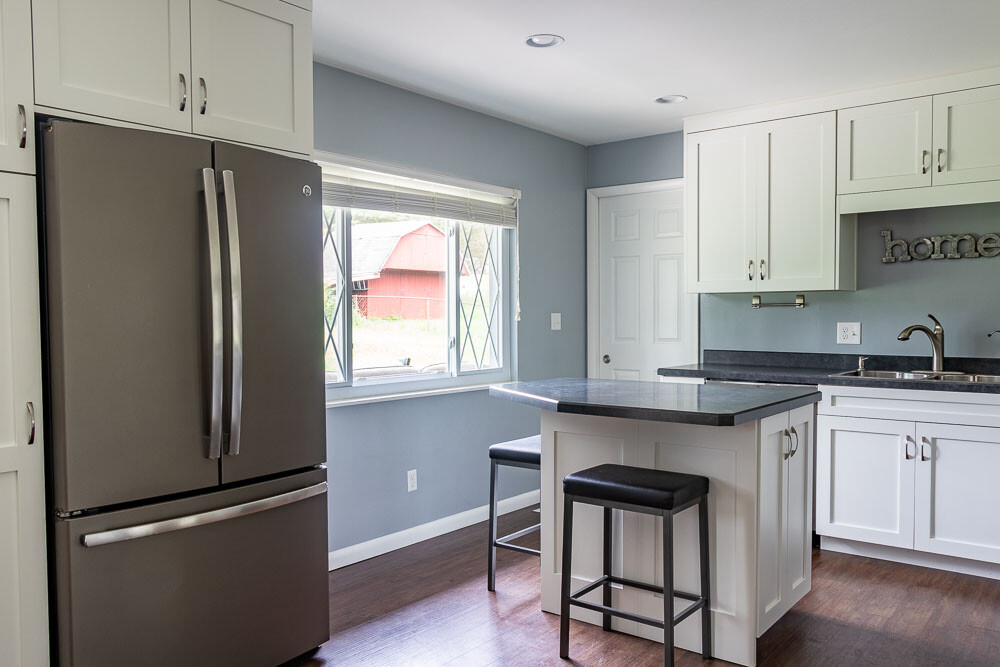
In order to close off the wall to the laundry room, we had to move the refrigerator. Our only viable option was a small section of wall between our patio doors and large picture window. Unfortunately, it was both cost- and risk-prohibitive to try to run a water line to the new refrigerator location. My husband misses the automatic ice maker, but this small sacrifice greatly enhanced the flow and functionality of the kitchen.
Closing off the Laundry Room
Closing off the laundry room required the removal of an external door that would have intersected the extended kitchen wall. We had just enough space to install a pocket door between the kitchen and laundry room that was large enough for our washer and dryer to fit through.
The Kitchen Remodel Reveal
Had I known I would eventually blog about this kitchen remodel, I would have asked my husband to take detailed before photos. Hindsight is 20/20.
Before
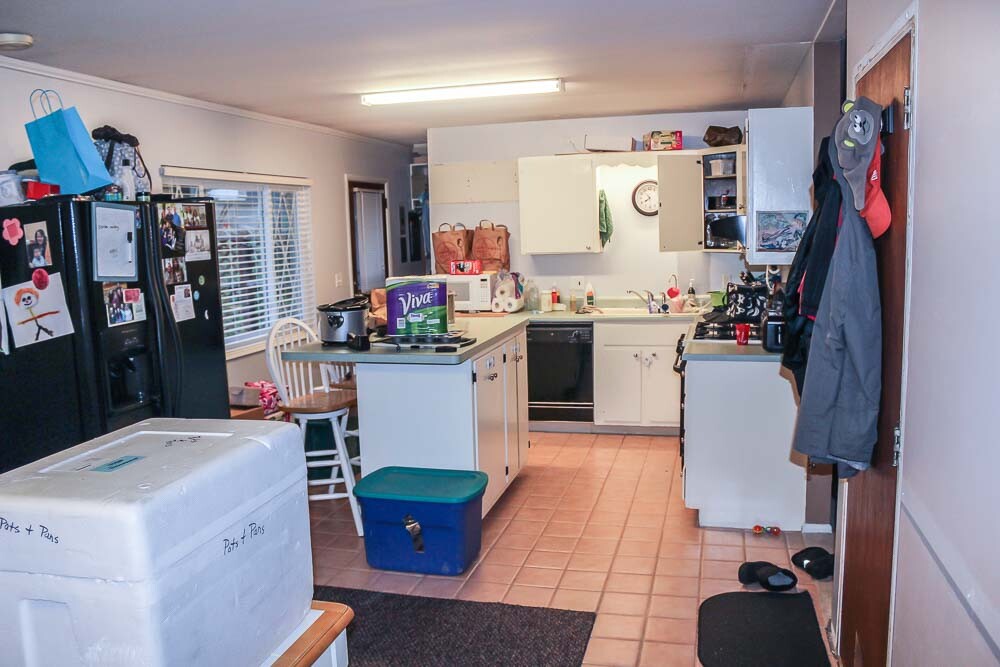
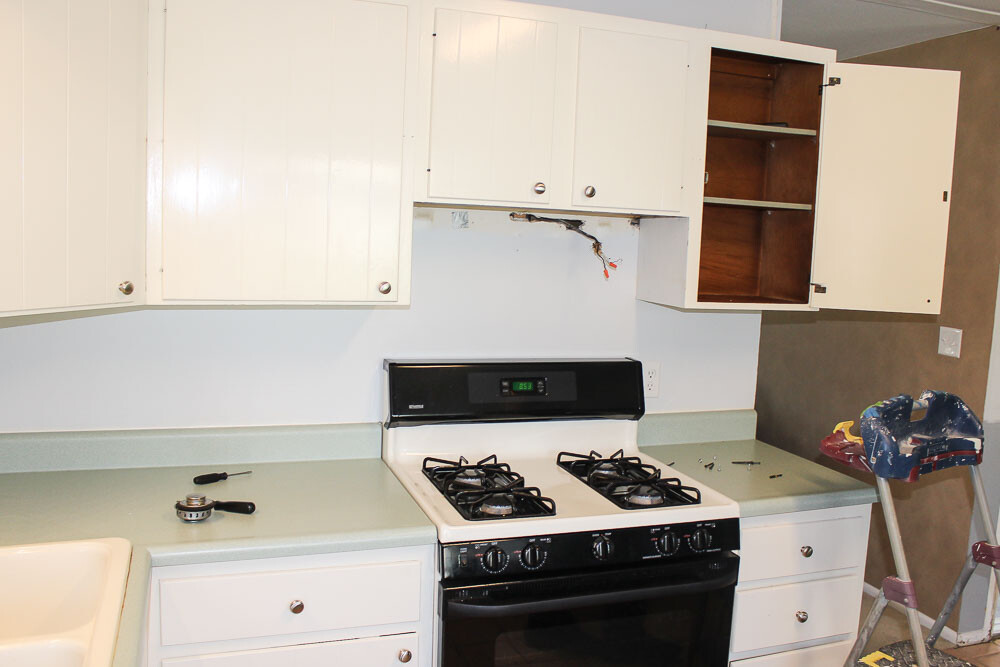
The photos above show the original kitchen as we’re packing it up and preparing to gut it. We moved the refrigerator between the picture window and patio door to test out its new location. Notice how the sink used to be right against the corner cabinet. The partial wall between the kitchen and laundry room did little to separate the two spaces. Lastly, the two floors were less than ideal – especially when we wanted the kitchen, dining, and office space to feel like one open space.
During
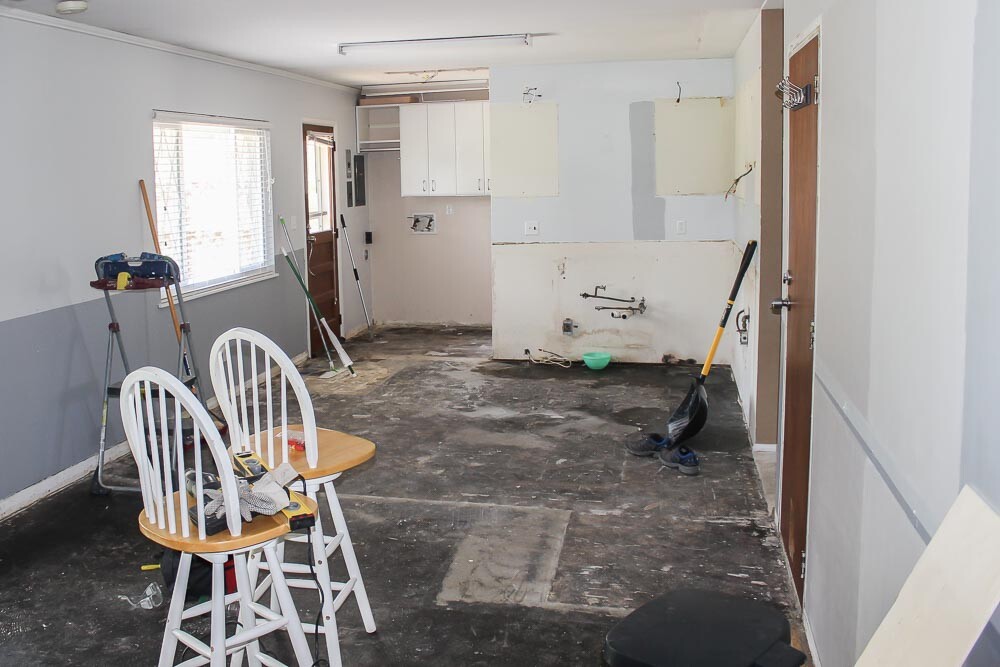
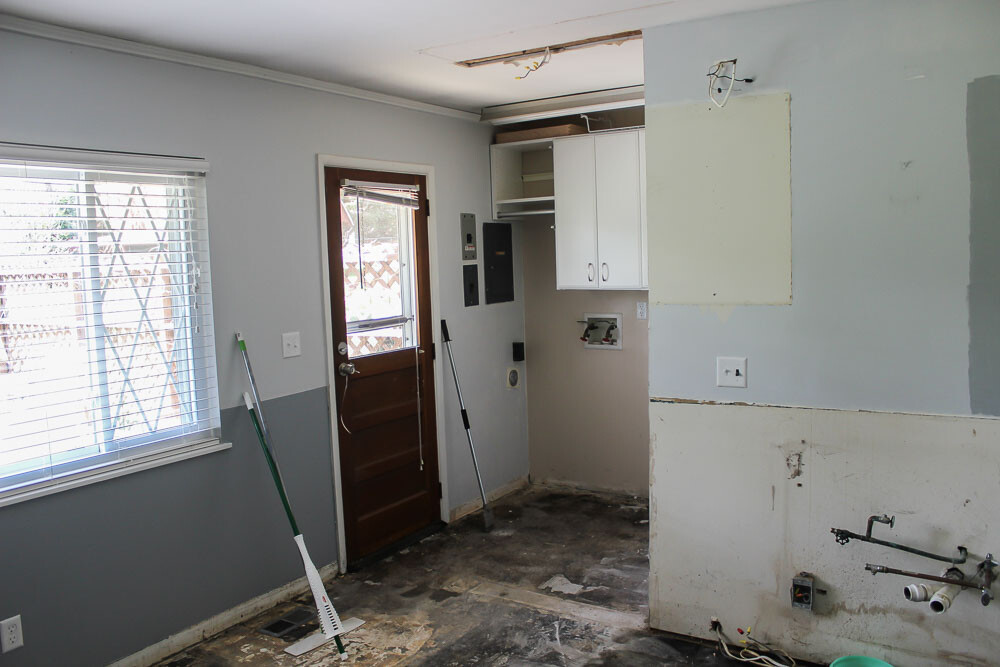
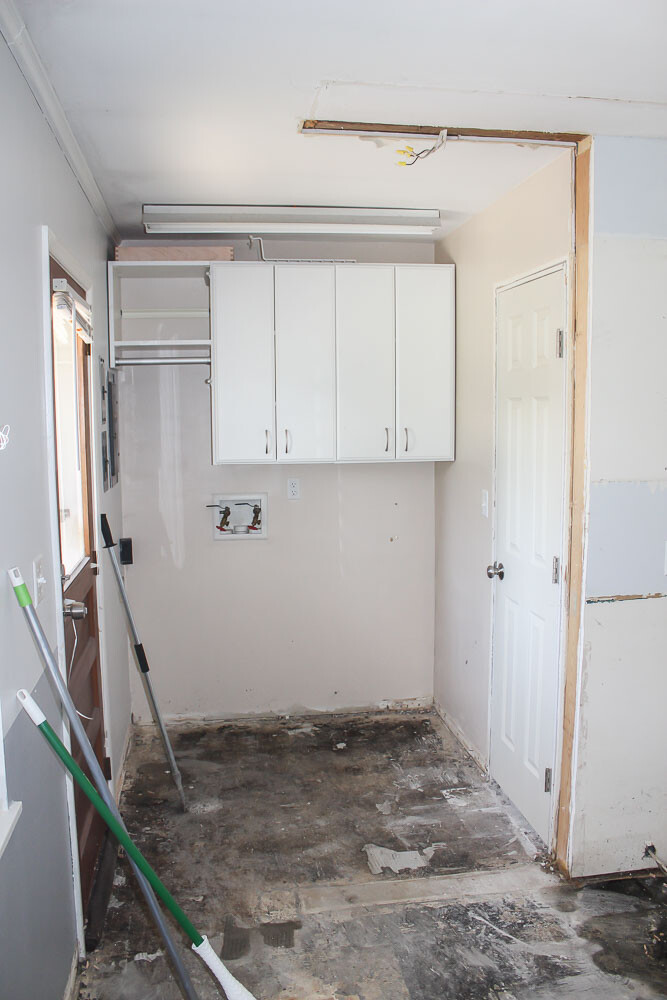
These photos show the kitchen when it was gutted. The cabinets hanging in the laundry room are EasyClosets; they were simple to uninstall and later reinstall when the project was completed. The partial wall between the kitchen and the laundry room was removed. It would be replaced with a pocket door and wall, but first the external door had to be removed and filled in.


When we removed the external door to the laundry room, we added a small window to keep a natural light source. Our contractor tried to find matching brick but could not do so. Fortunately, we were able to take bricks from our chimney by shortening it. After we removed the fireplace to create more space, the chimney wasn’t in use anyway.
After
Save to Pinterest: Small Kitchen Remodel Reveal
The new kitchen features a refrigerator enclosure with a pantry. The island has seating for two, a trash/recycling pullout, and room to store my stand mixer and food processor. The pocket door conveniently hides the laundry room and muffles the noise of the washer and dryer.
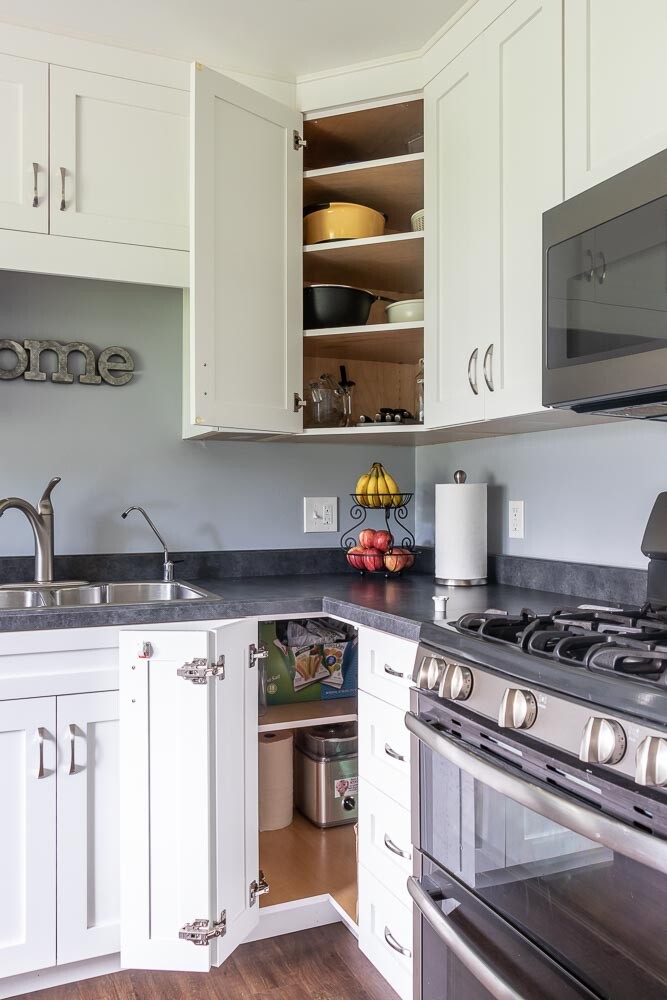
Save to Pinterest: Corner Cabinets (Closed|Opened)
Notice how we moved the sink to the left by about 10 inches. This allowed space for a 90-degree lower corner cabinet. The original kitchen already had a 45-degree upper corner cabinet. Since the upper cabinet provided great storage for large mixing bowls, we simply replaced it with a taller version.
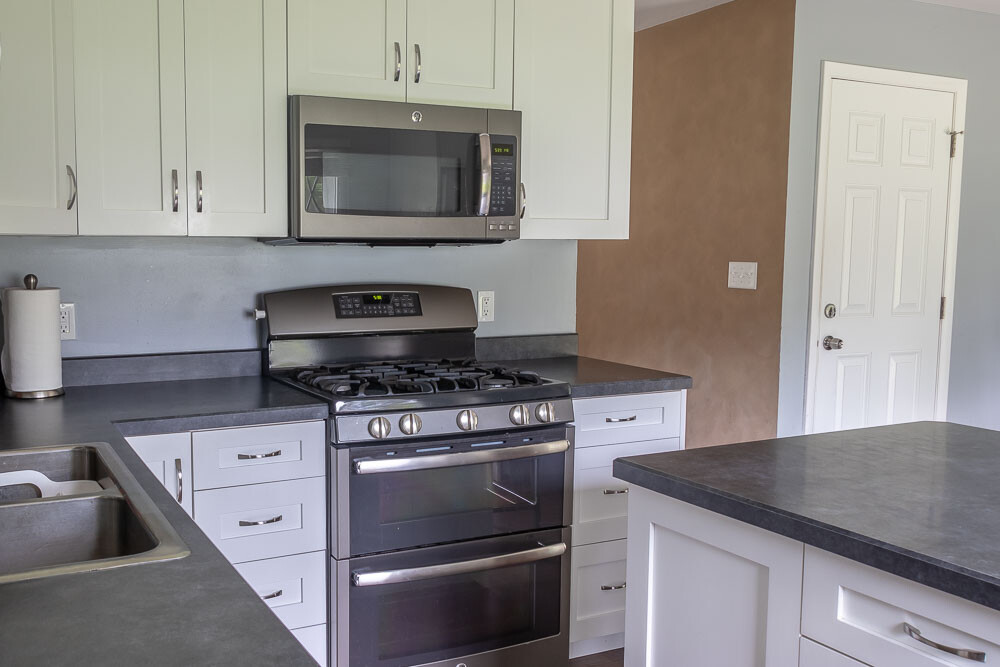
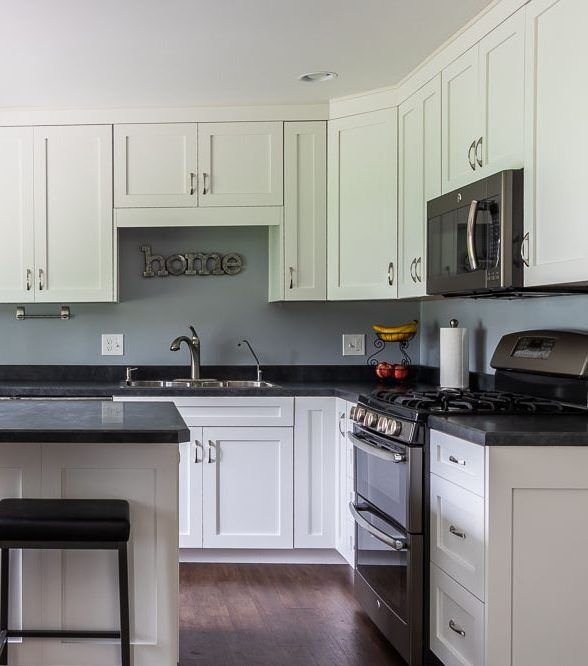
Save to Pinterest: Double Oven for Small Kitchen
We upgraded to a double oven and made sure there was enough room above the range to install the microwave. I love the two sets of drawers on either side of the range. I store my pots and pans in the two deeper drawers on the right.

Save to Pinterest: Open Kitchen, Dining, and Office
Now that there is one unified floor, the kitchen, dining, and office space flow well together. Although the dining/office built-ins were custom made locally, the kitchen cabinets are a close match. Both are shaker style with full overlay.
Letting Go
This kitchen has been a joy to use for the past four years. As I write this post, we have a contract on another house. Although I know we need more space for our family of six, it is still hard to let go of the home that we have poured ourselves into for the past 14 years. I have been working hard to prepare my heart for our next home. I am thankful that my husband’s newfound love of photography and this blog are helping me let go.